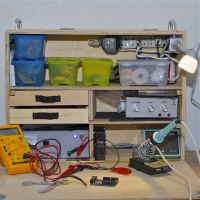
Mobile Electronics workbench
Portable electronics lab, mobile hack rig, etc.
The problem
My oldest kid got a very noisy police toy and rather than just removing the batteries I decided to lower the volume instead. This however made me realize my soldering iron was packed away in bag stowed under the stairs and my hand tools where in the workshop in the shed. This meant I never got around to tinkering with this toy and didn't get to tinker much with electronics at all.
In a perfect world I would of course have a permanent electronics lab workbench where everything would be ready for small and big projects at all times. But I don't have room for that and having all those small parts around is not optimal with small kids around - So I needed another solution.
The idea
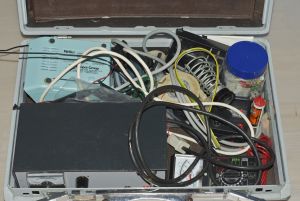
My first thought was to use the briefcase that my soldering iron and power supply was already in - but I wasn't quite roomy enough which gave me an excuse to build something.
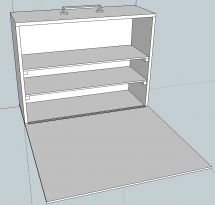
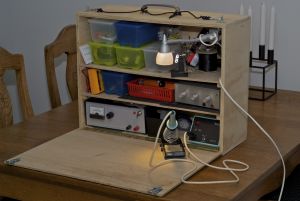
I sketched out my general idea and started contemplating what to put into it: My soldering iron goes without saying, along with my variable power supply, a signal generator, a multimeter, and assorted small hand tools. I also wanted good work light, easy access to power and a work surface.
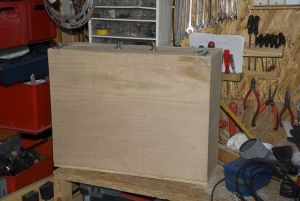
With a good idea of much room I needed, I used Google Sketchup to model it. (download sketch up file) I ended up with a design that is approx 42 cm(16.5") high , 20 cm(7.9") deep, and 56 cm(22") wide, measured externally.
Building it
I cut the plywood with a circular saw, that someone was kind enough to lend me. (note to self, buy circular saw) and after that assembling it was fairly straight forward.
The pieces are both glued and screwed together and the screws are countersunk. To make sure the plywood would not split I predrilled the holes.
All parts of the box, except the front are 12 mm(0.47") plywood the front is 6mm(0.24"). The Shelves inside are 6mm(0.24")
Because the front board is so thin mounting the piano hinge and the closing/locking mechanism is a bit tricky. I predrilled the hole all the way through the board, then cut screws down in length and any excess screw was grinded down with a file. This way I get as much screw as possible without having anything stick out of the board. As there would have been had I been using bolts and nuts.
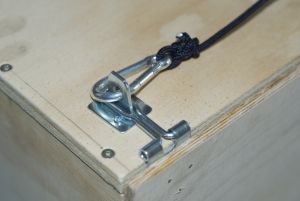
Finding a good locking mechanism as also a bit of a challenge. I was initially looking for a draw hasp but my local hardware store does not carry anything small enough to fit my purpose so ended up going with some mountings which are for padlocks and locking them with small snap hooks. Its a little more work to open it but it has the added benefit of letting you add a small padlock if you need to keep children or the like out of the electronics workbench.
The result
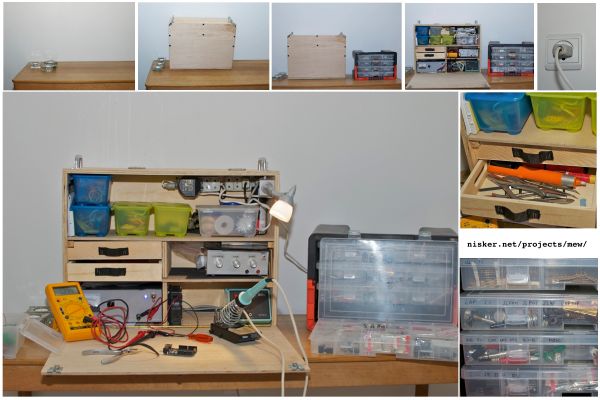
In one the pictures you can see the first revision one of the workbench set up on the dinning table, which no longer is out of bounds for electronics projects. And the project came full circle as the first thing I hacked on it, was the noisy toy.
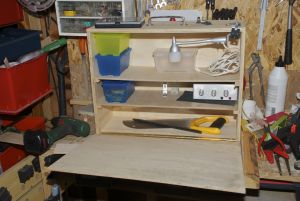
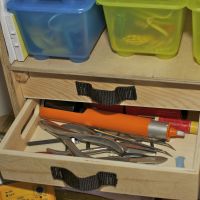
Later I changed the internal setup a bit and added the shelf dividers/supports and small drawers for tools. I also got some other handles and moved them to the side as I had originally intended - It's rather heavy to lift in one handle.
So now I have an electronics lab/workbench that I can setup every in the house in a couple of minutes. Packing it up takes about the same time when the soldering iron and lamp cool have had time to cool off.
Ressources
- Download the Google Sketchup file.
- Make Magazine blog post about this project.
- Hack a day post about this project.
Other mobile solutions
- A Mobile platform for audio development
- Smaller setup in an aluminium briefcase
- Robovergne's mobile rig and parts storage
- Labo Mobile (french)
- A version on Instructables including Fumeextractor
- Great model with fold-out lamp and toolholder
Gettting started with electronics:
- Make: Electronics - MAKE's book about getting started with electronics.
- The electronics club - great site with small projects and guides to get you started.
Workshpop Inspiration:
- Make it anywhere with a mobile lab - Building a complete electronics workshop in a trailer.
- A very nice DIY solution - If you have way more space then me.
- Workbench pictures on Google
- Workbench contest on HackedGadgets.com - the contest is over, but the pictures are still cool.
- Workbences on LetsMakeRobots.com

