Ultimaker 2(+) Education upgrade package
Published: 9. Nov. 2016
Background
I've been managing our 3D printers at work for a while, and during that time have made some upgrades that I think a worth sharing. Particularly in an education environment where you need a lot of uptime with a minimum of maintenance - but they will be good for any Ultimaker 2 printer.
All the printable upgrades described here can be made in PLA, and requires very few extra parts to make(mostly nuts, bolts and washers).
Two of the upgrades do not apply to printers that have been upgraded to Ultimaker 2+ or have been bought as Ultimaker 2+, these are clearly marked.
Feeder
(only applies to printers without the +)
The feeder on the oldest printer started acting up after af couple of years of service. The result was failed prints due to grinding of the filament. The problem was that the bearing in feeder could no longer turn freely - which was caused by wear to the feeder.
To solve the problem an open source feeder replacement was printed on the other printer. There are lots of alternatives to be found on youmagine.com and www.thingiverse.com but this model has a lot of positive feedback and after installing it the printer has had very few failed prints due to filament grinding and it even prints flexible filament very well.
The only small downside I've encountered with this upgrade is that the timing for reversing the filament during filament change is off - you may have to run it twice for the filament to completely clear the Bowden tube. I suspect this is due to the feeder gripping the filament much harder than the original. The design does however allow you to experiment with how tight a grip you want - partly by changing it with the adjustment screw and partly by having multiple choice for length of the bearing holder.
Alternative UM2 Feeder - version two by Iroberti on youmagine.com
Olsson block kit
(only applies to printers without the +)
I will only recommend that you make this upgrade if your are on a very tight budget as the upgrade kit for turning your Ultimaker 2 into a Utimaker 2+ includes the Olsson block upgrade and the Olsson kit can be quite expensive compared to the + upgrade kit.
The Olsson block kit is a big improvement over the original extruder block - It allows you to change the nozzle size very easily for making more detailed or less detailed but much faster prints.
However I think the biggest improvement is in the ability to change a clogged or worn nozzle without having to change the entire heating block.
I found the instructions for this upgrade to be fairly good - though a delicate touch is required in order to avoid damaging the actual heater and sensor. I recommend that you print the nozzle tourque wrench designed by the Olsson block designer to make sure you do not overtighten the nozzle.
Olsson block on the creators website
Hinged door
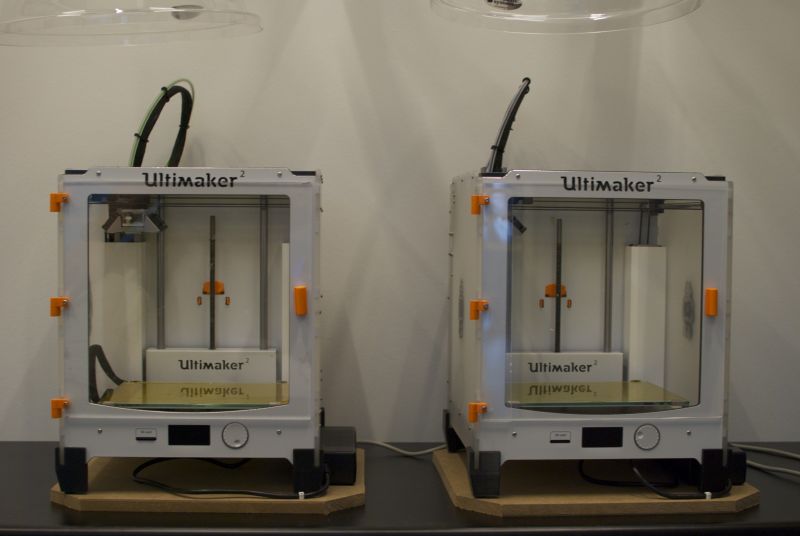
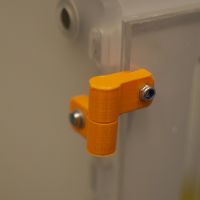
I added a door on the printers to ensure a more even distrubition of heat in the chamber. The printers are placed in a small room and have an extractor hood placed right above them to remove the particle polution. This means that there will be a draft through the open front if there isn't a door there. The printers I manage mainly print PLA - but should there be need to print ABS avoiding draft and stabilizing the temperature is even more important.
There are again a number of different design for adding a door to the Ultimaker 2 - The one I used was chosen for these reasons:
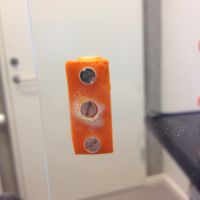
- It can be installed without making extra holes in your Ultimaker - to have magnetic closure your need to glue a magnet to the printer.
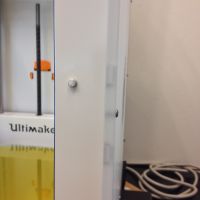
- The door will swing alongside the printer and be complely out of the way if needed
- The door can be taken of without tools - simply lift it up - if you need it completely removed for maintaince or the like.
If I were to install a door again, I would modify the hinges so the hole in the acrylic plate is further from the edge.
ultimaker-2-front-door-with-hidden-magnetic-catch by Keith Violette on youmagine.com
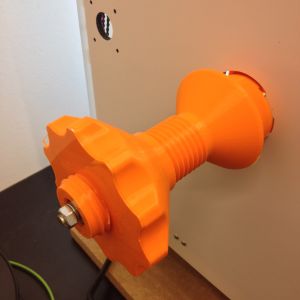
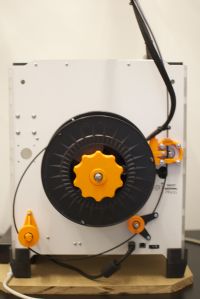
Spoolholder with bearings
The feeder on the Ultimaker 2 has always been a weak spot in the design and therefore any reduction in friction for the flow of filament is an improvement
This spoolholder runs extremely smoothly and as soon as it was installed on the printers I stopped hearing the sound of the filament spool suddenly skipping a long distance because the tension on the filament had become to much.
Low friction UM2 spoolholder by by Iroberti on youmagine.com
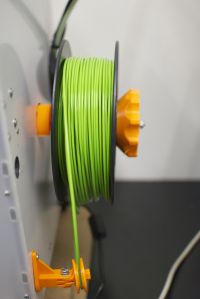
Filament guides with bearings
With these guides installed the filament gets a bigger arch which lines it up with the feeder much straighter than the original. And the bearings ensures little or no friction.
Please note that these upgrades require the feet upgrade below in order to give room for the filament arch.
The guide below the feeder: UM2 filament guide by skroob on youmagine.com it uses the wheel from UM2 filament guide by Ppyromann on youmagine.com
The guide replacing the original filament guide is this design: UM 2 - Best Filament Guide w/ bearing ;-) for Ultimaker 2 by Steckdosentier on youmagine.com
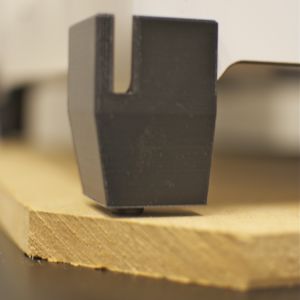
Feet
I added feet to the printers for four reasons:
Having two working printers in close proxymity means that vibrations from one printer influences the other printer. This can be helped tremendously simply by adding adhesive rubber feet to the printer. However there isn't a lot of surface for adding rubber feet on the Ultimaker printer - The printed feet creates that.
the taller feet lets more air under the printer to help the main controlboard of the printer to stay cooler.
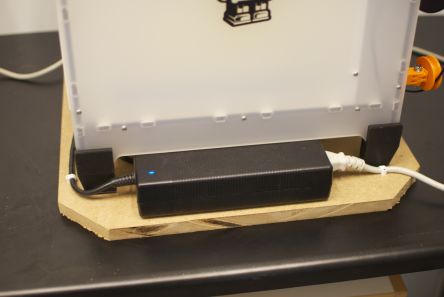
the legs are tall enough that the printer power supply can slide under which helps to reduce the overall footprint of the printer.
the extra height is needed for when the filament guides described above are mounted as the filament would otherwise touch the table.
Ultimaker 2 feet by Grefor Luetolf on thingiverse.com
Turnplate
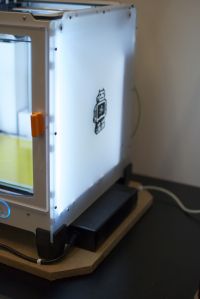
As you in my experience often need to access the back of the printer when changing filament and the like, I wanted way to be able to turn the printer around without lifting it. I solved this very lowtech by sawing out a piece of MDF and placing the printers on top. This works very well as the table the printers are on has a smooth surface allowing me easily turn the printers around. The corners are cut of the plate as the table is not very deep.
To make sure that the smooth surface will not eventually cause a printer to slide over the edge, from vibraton during printing operation, the edge of the table has been fitted with a small ledge. I used adhesive rubber seal, usually used for windows. (not pictured)
Feedback
Have you spotted errors? Found the article helpful? got a suggestion for another upgrade? Feel free to contact me
Ressources
3D files for the upgrades
- A visual ultimaker troubleshooting guide(by 3dverkstan.se) One of the best troubleshooting guides for Ultimaker printers.
